
Replace the stock interface of your ZLT X28 or X28 PRO with real OpenWrt. OpenWrt 23.05.5 userspace on the MediaTek MT6890, 5G band & cell locking, SMS conversations & a local HTTP API, LuCI over HTTPS, and WireGuard, OpenVPN and Passwall2 preinstalled.
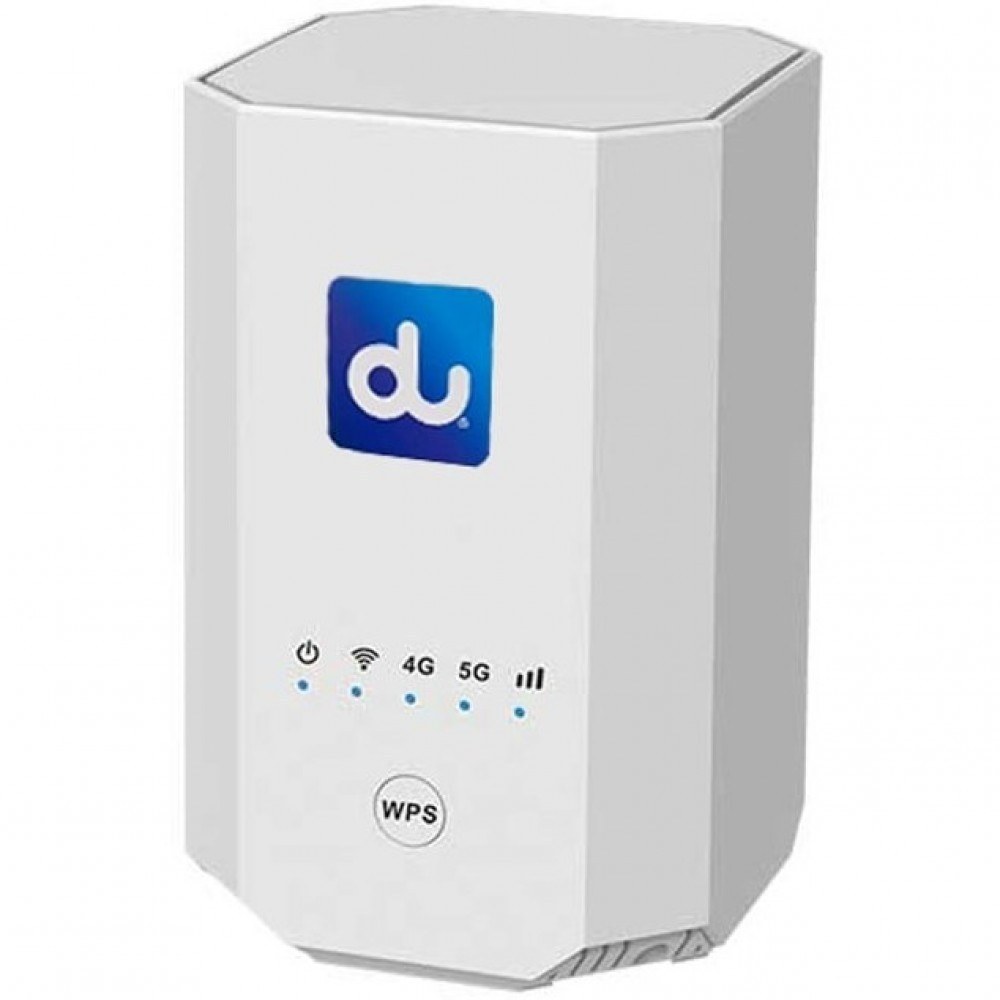
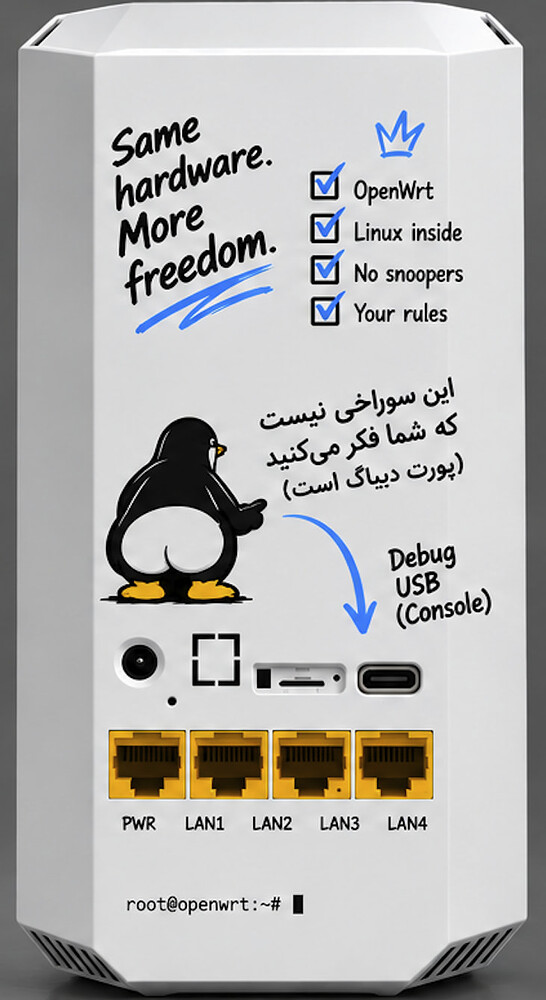
The stock interface is replaced by OpenWrt userspace. The vendor kernel and the 5G modem backend stay, so the modem keeps working.
Text messages in LuCI (Services → Telephony) as conversations, with a phone book and a local HTTP API with API keys for machines on your LAN. Received messages move to the router, so the SIM does not fill up.
APN, operator selection with a network scan, 4G and 5G band locks, cell lock and signal status on a standard LuCI interface page.
The stock firmware makes voice calls. We are building VoIP for OpenWrt, with a VoIP server on the router and more. It is not ready yet: voice calls are not supported in the current release.
The standard OpenWrt LuCI web interface with UCI configuration, SSH, netifd, dnsmasq and firewall3. Vendor daemons run only as the modem backend.
Passwall2, WireGuard, OpenVPN, L2TP, PPTP and SSH tunnels, managed from LuCI.
Signed upgrades write and verify the slot that is not running, then switch to it; x28-bootok manages the boot counter. Use x28-upgrade or the LuCI update notice. Nothing installs by itself; back up your settings first.
The x28-telephony package adds Services → Telephony to LuCI and an HTTP API for machines on your LAN. Voice calls are not supported yet. Documentation
Conversations by number as in a messaging app: a paged list on the left, the thread with a reply box on the right. A new message takes its recipient from the phone book or a typed number. Delete a message or a whole conversation.
Names for numbers, kept on the router and not on the SIM. Received and sent messages are stored on the router too, root-only, and kept across firmware upgrades.
The SIM has 50 slots. The service looks at it every 15 seconds, copies each received message to the router and only then deletes it from the SIM. Long messages (up to 10 parts) arrive in parts and are shown joined.
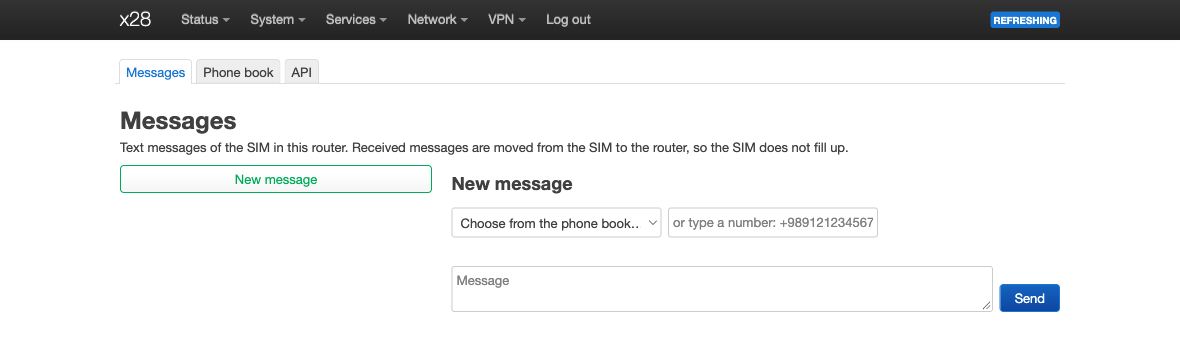
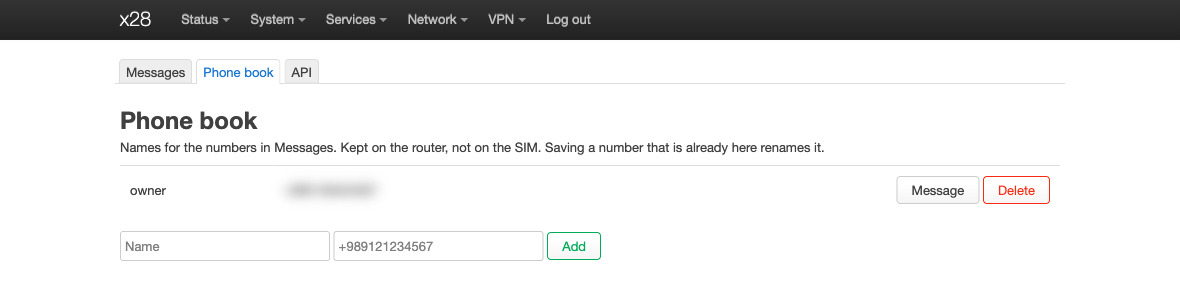
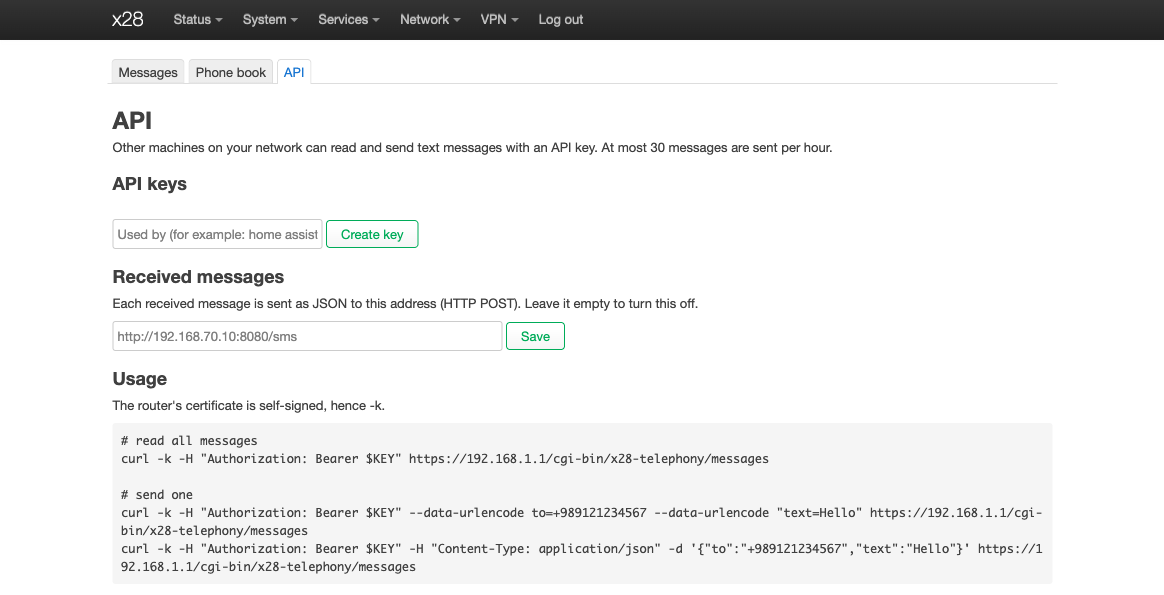
Any machine on your LAN (Home Assistant, n8n, Node-RED, a curl script) can send and list messages, and received messages can be pushed to an address you set. No cloud service is involved.
# list messages, oldest first
curl -k -H "Authorization: Bearer $KEY" \
  https://192.168.70.1/cgi-bin/x28-telephony/messages

# send a message
curl -k -H "Authorization: Bearer $KEY" \
  -H "Content-Type: application/json" \
  -d '{"to":"+989121234567","text":"Hello"}' \
  https://192.168.70.1/cgi-bin/x28-telephony/messages
200 | done |
400 | bad number, or empty or too long text |
401 | no key, or a wrong one |
429 | more than 30 messages sent in the last hour |
502 | the modem refused the message; it is kept as failed |
The modem is a normal netifd interface (proto x28_mipc) with its own LuCI page. Everything below is set on the interface page, under the Carrier tab. Documentation
Automatic, 4G only or 5G only. Set before the data call, and read back from the modem.
Allow or deny lists of LTE bands, and a 5G band mask set with x28-nrband. A mask outside the bands the modem supports is refused.
Lock to one cell by its EARFCN and PCI, or turn the lock off again.
Automatic or manual, with a network scan. A scan can take a few minutes and drops the data connection, which comes back by itself.
IPv4, IPv6 or both. Leave the APN empty and it is taken from the SIM's operator. Roaming is off by default.
Operator, registration, serving cell and neighbours with RSRP and RSRQ, carrier aggregation and the 5G (EN-DC) state.
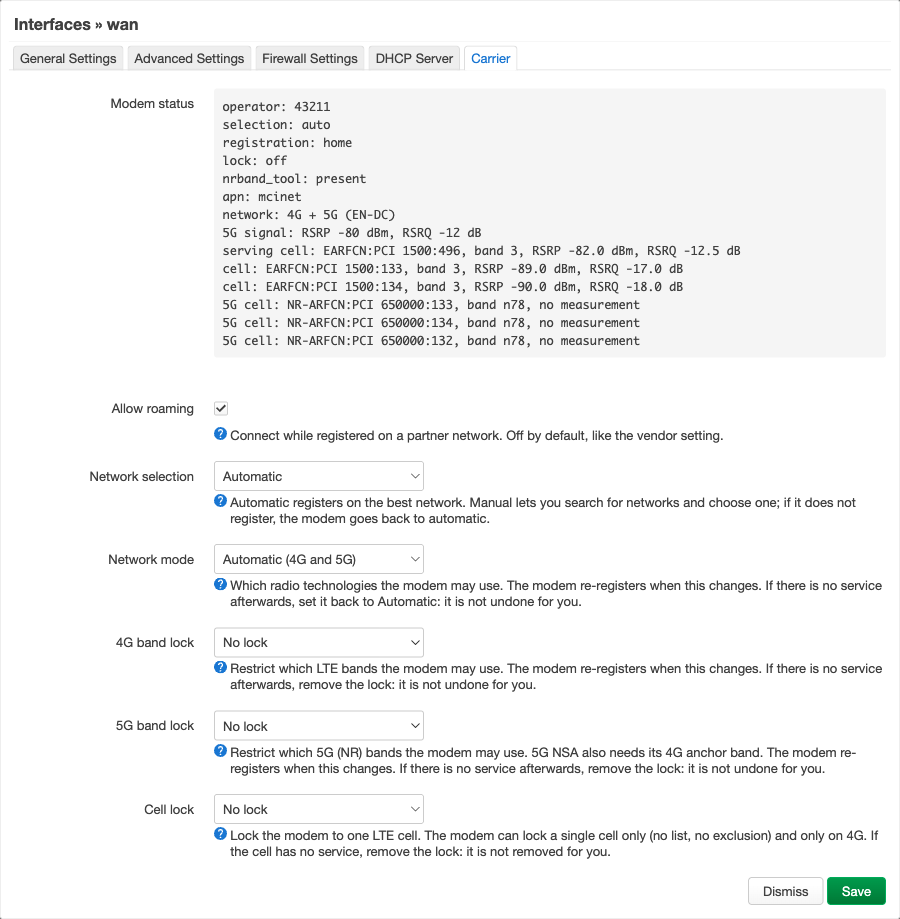
Which of these your operator uses depends on your location. See the test log for what has been checked on real SIMs.
The router has what it takes to put your whole LAN through a tunnel or a proxy. Passwall2 setup notes and measured performance
Transparent proxy with xray: the whole LAN goes through the node you pick, switched from LuCI.
A module built for the vendor kernel, with LuCI support and the wireguard-tools.
OpenVPN with OpenSSL and its LuCI page; the tunnels you enable start at boot.
L2TP client, configured as a LuCI interface.
PPTP client, configured as a LuCI interface.
Forward ports and tunnel traffic over SSH.
And more: other packages from OpenWrt's feeds and the signed X28 feed install with opkg or System → Software. Kernel modules from the official feeds do not load on the vendor kernel, so incompatible ones are refused instead of installed broken.
The flasher is the only supported way to install, back up and recover. These are the steps of the tutorial on the OpenWrt Forum; the screenshots are from flasher v0.4.0, later versions may look slightly different.
Download the latest X28 Flasher for your operating system, install it and launch it.
Get it from the flasher releases.
Use a USB-A to USB-C cable; USB-C to USB-C does not work. Follow these steps in the exact order:
Important: Do not connect the power adapter before the 10-second wait. The order matters for the flasher to reach the device.
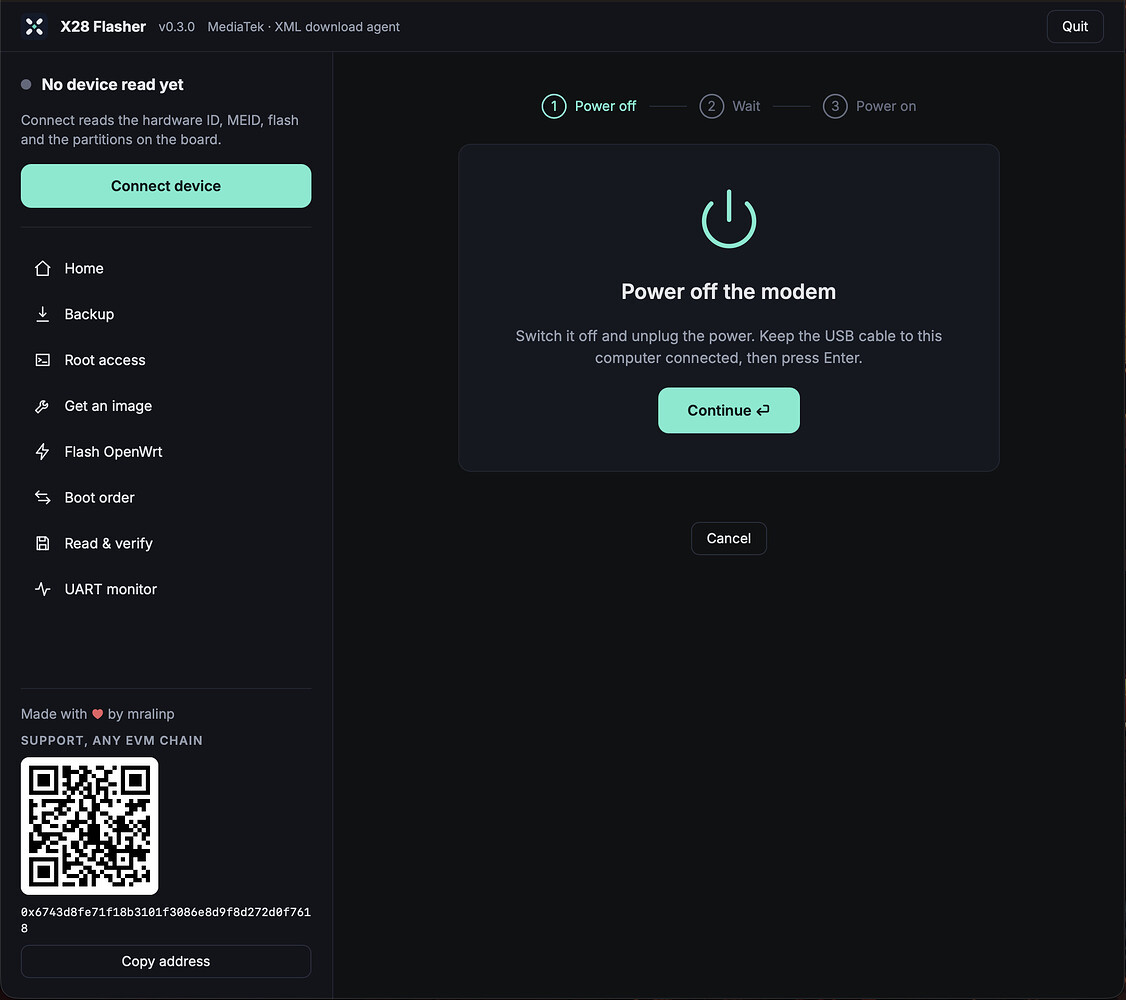
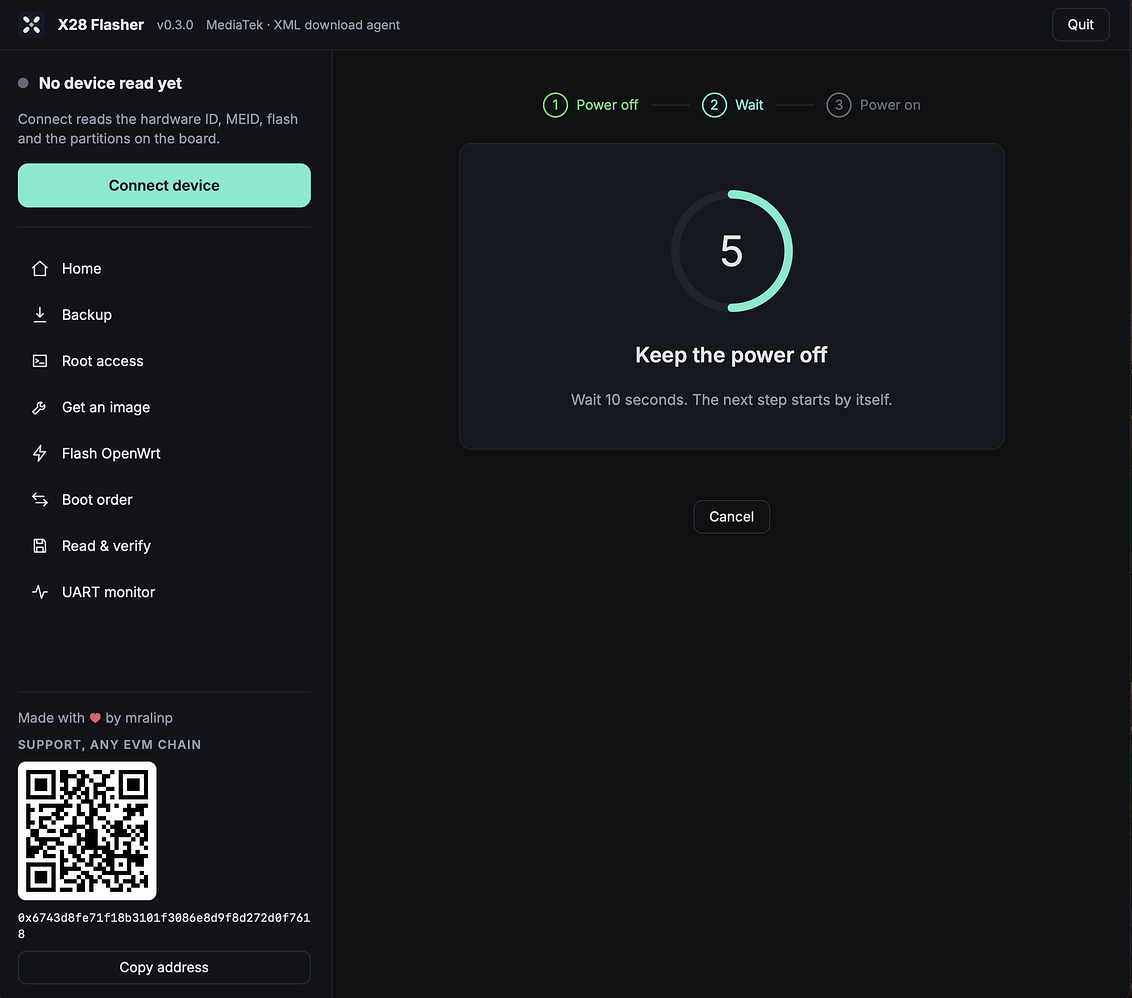
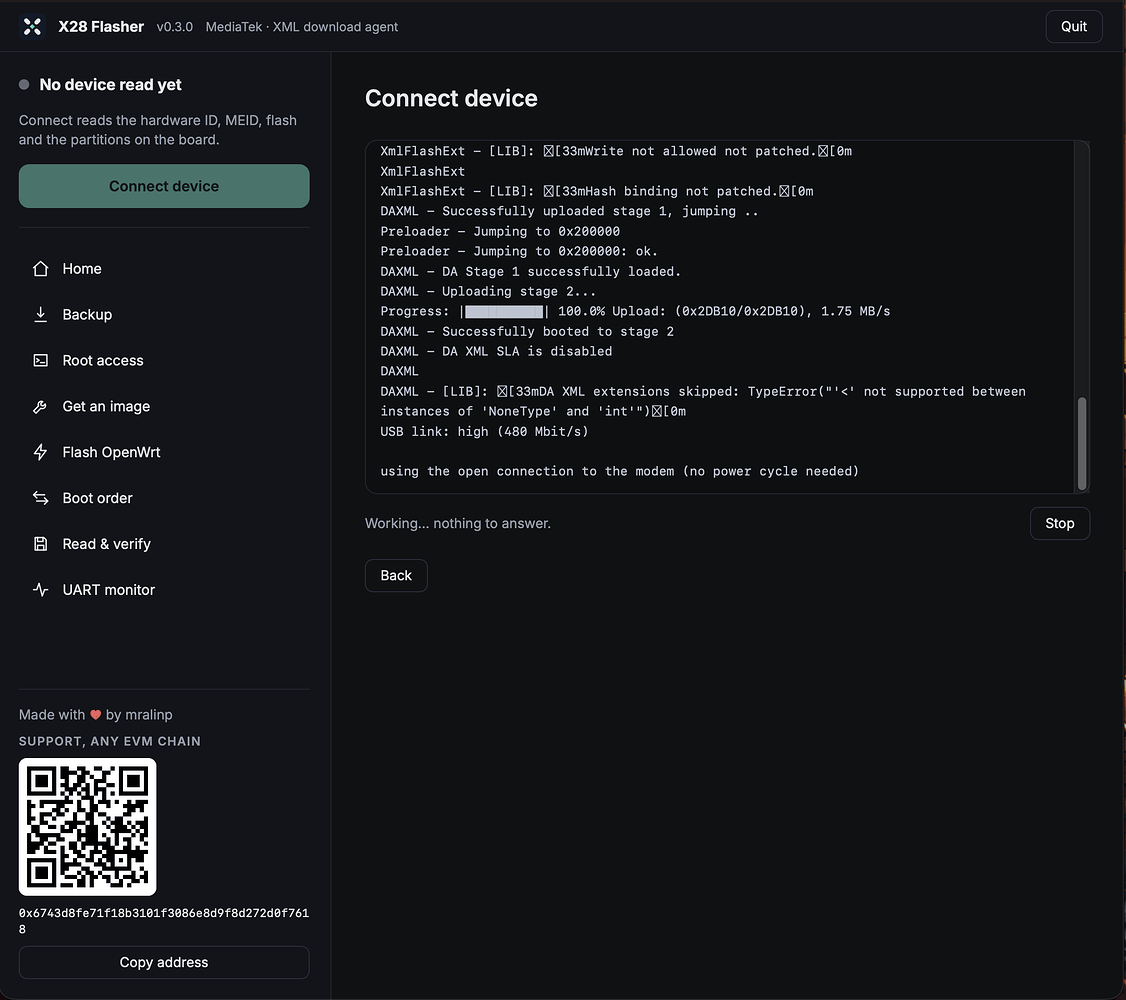
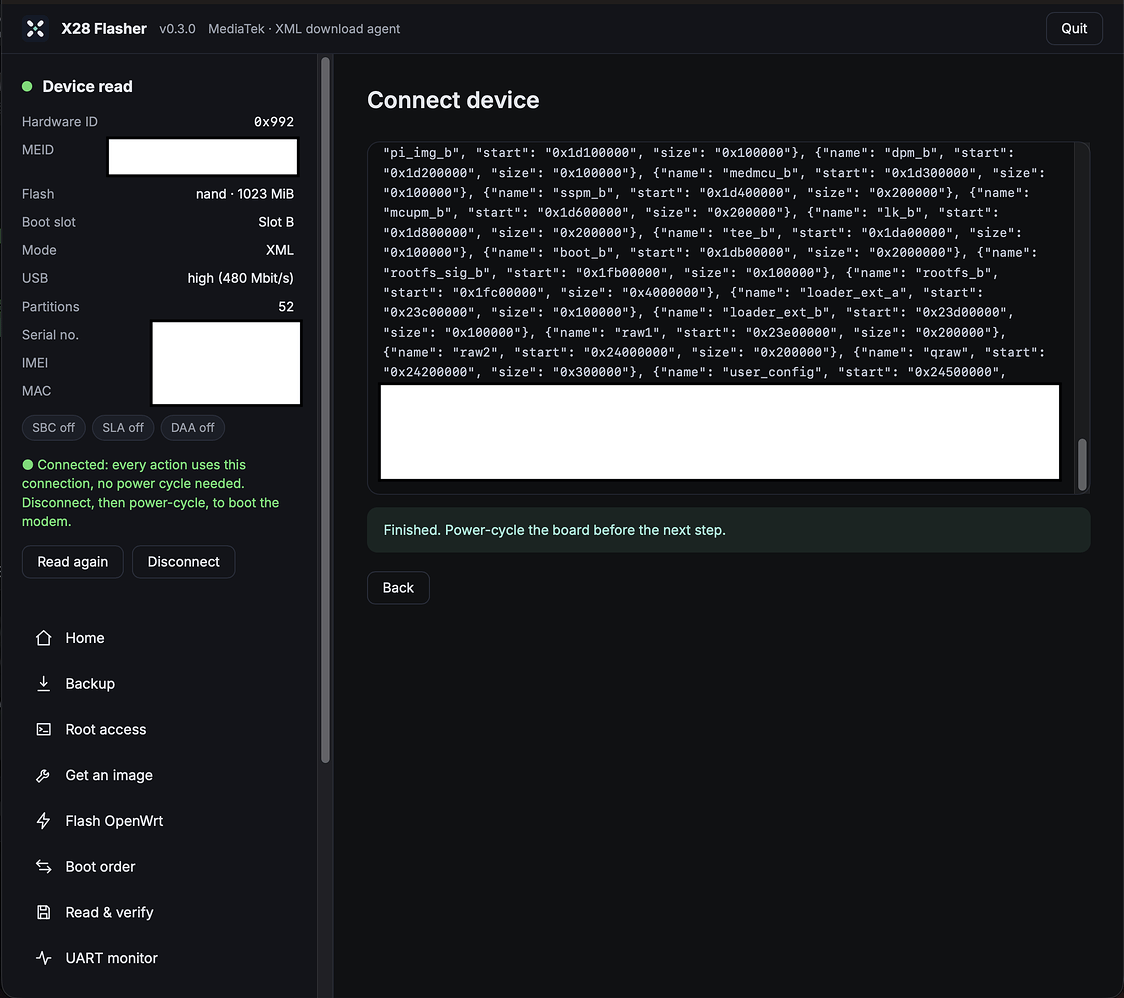
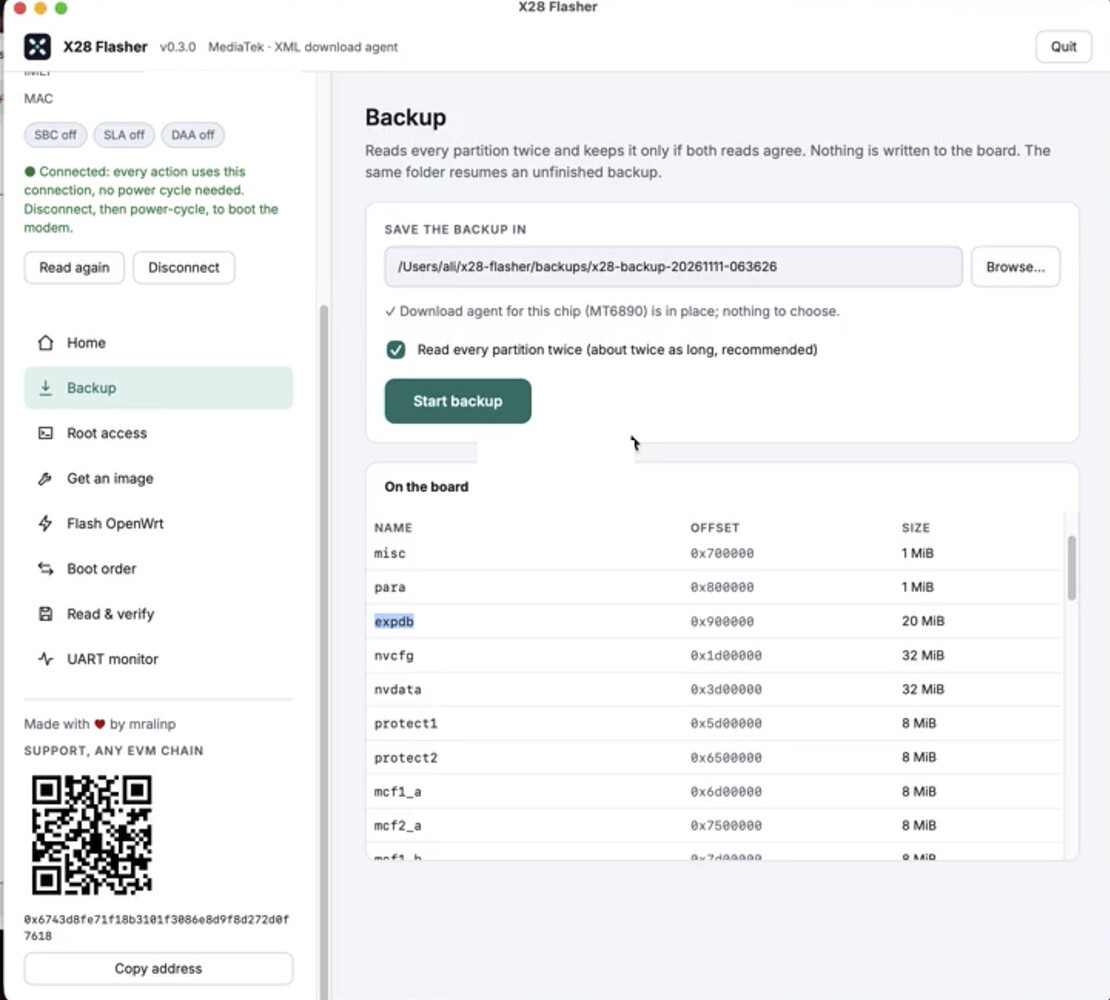
Before flashing anything, back up the original firmware.
Important: Do not skip this step. The backup is how you restore the original vendor firmware if anything goes wrong. It takes about 20 to 50 minutes; if it fails, retry and it resumes.
You do not need Docker or files from your vendor firmware to get a flashable image.
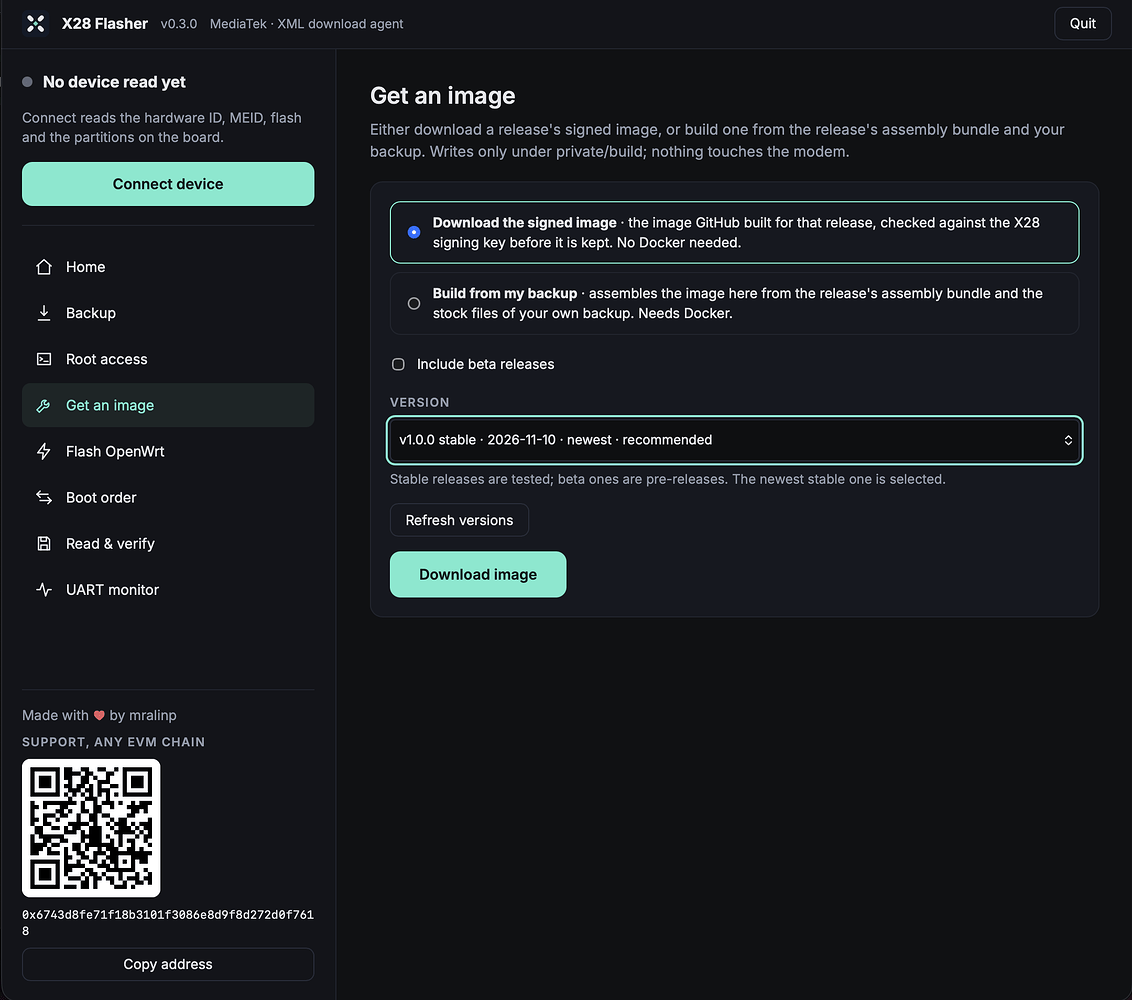
In the Device read section, find the device information: MAC address, IMEI, serial number and the current boot slot (A or B). Note the slot; you select the same one when flashing.
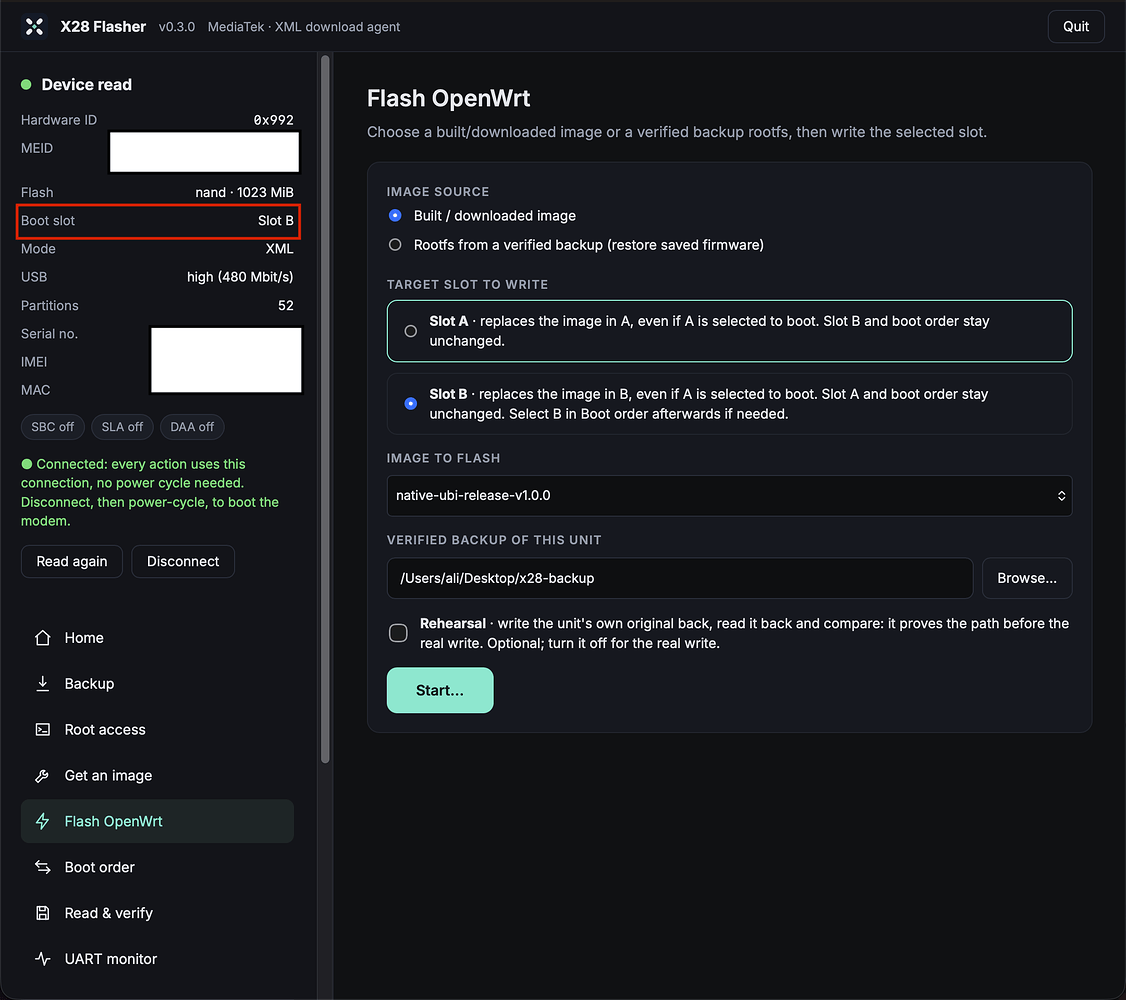
Warning: The selected slot must match the current boot slot. Flashing the wrong slot can cause boot problems.
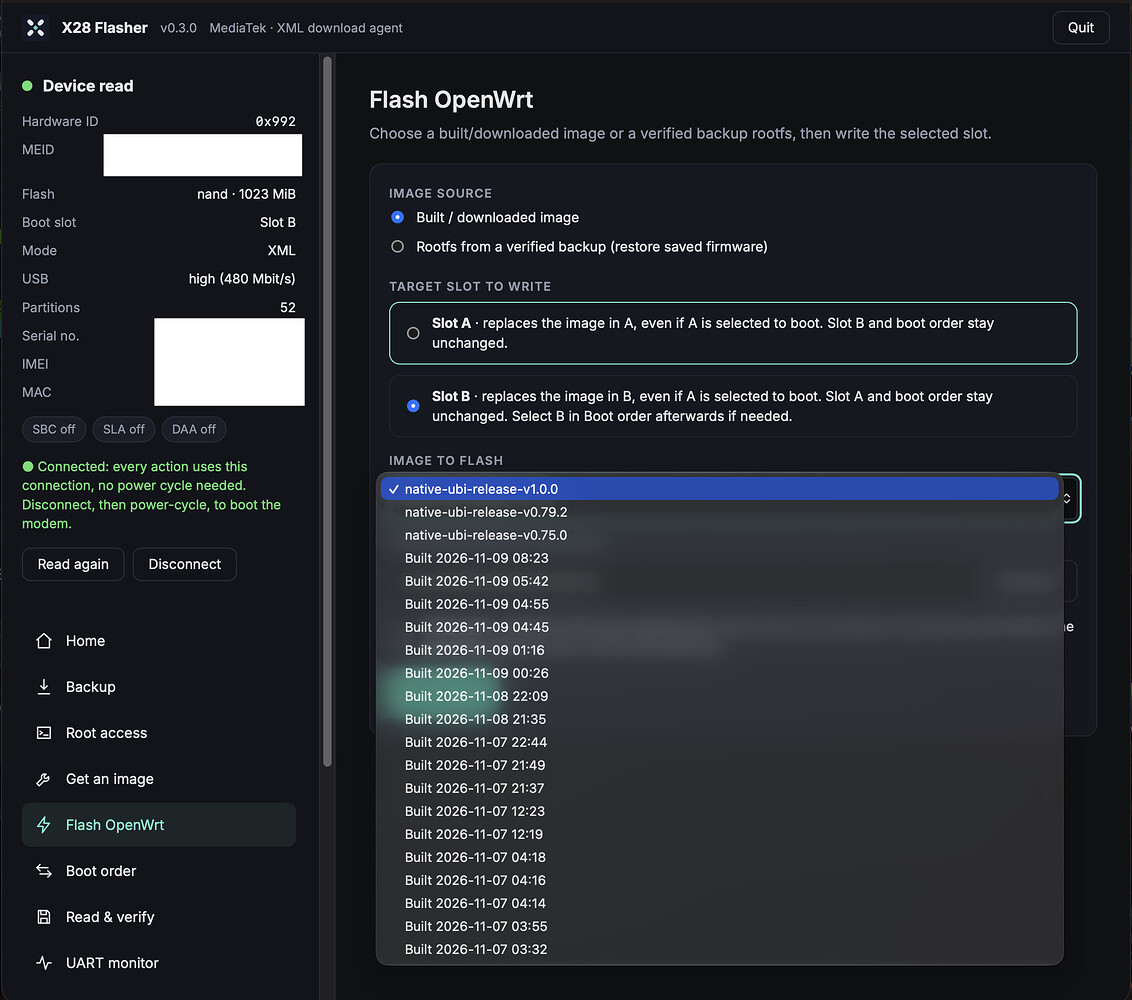
Important: Do not disconnect the USB cable or interrupt power while flashing.
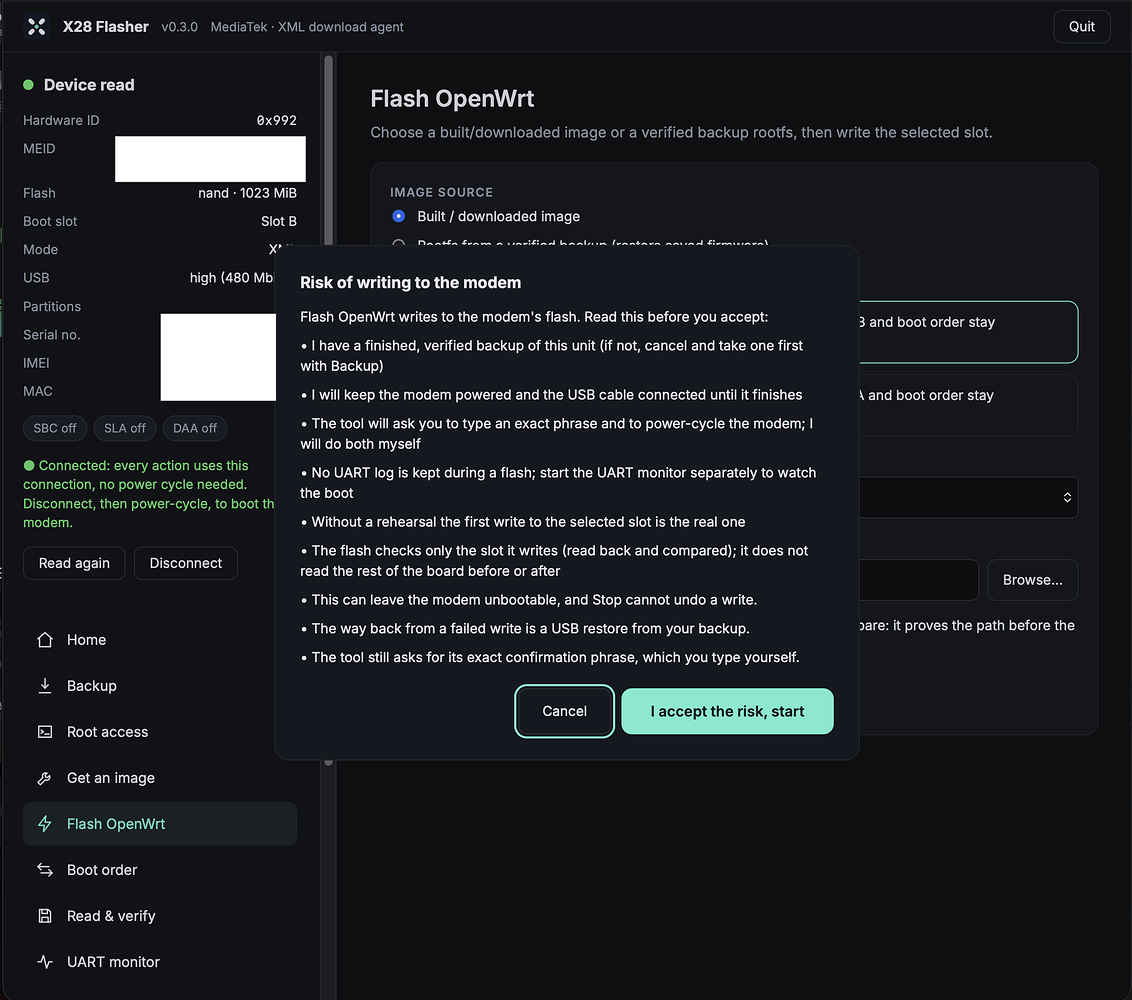
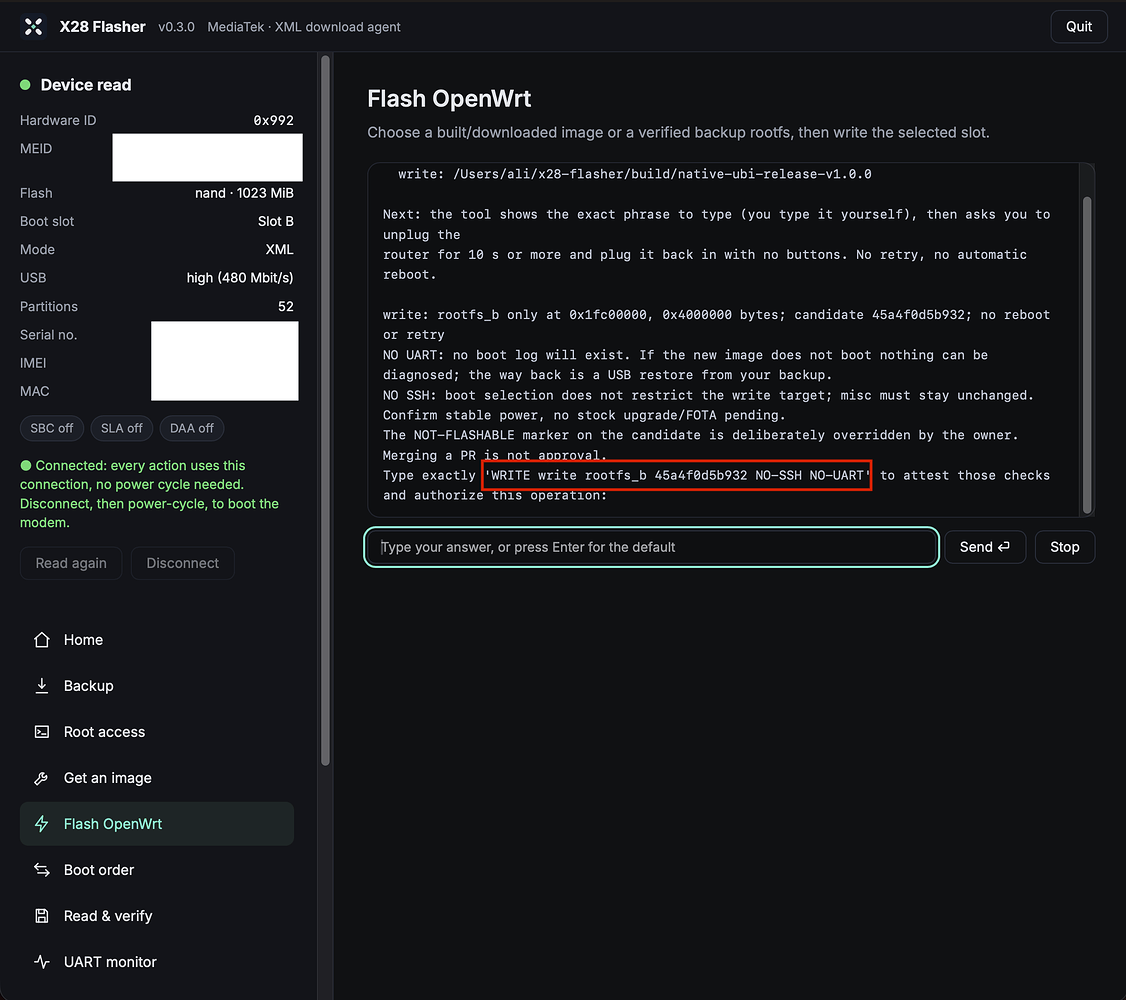
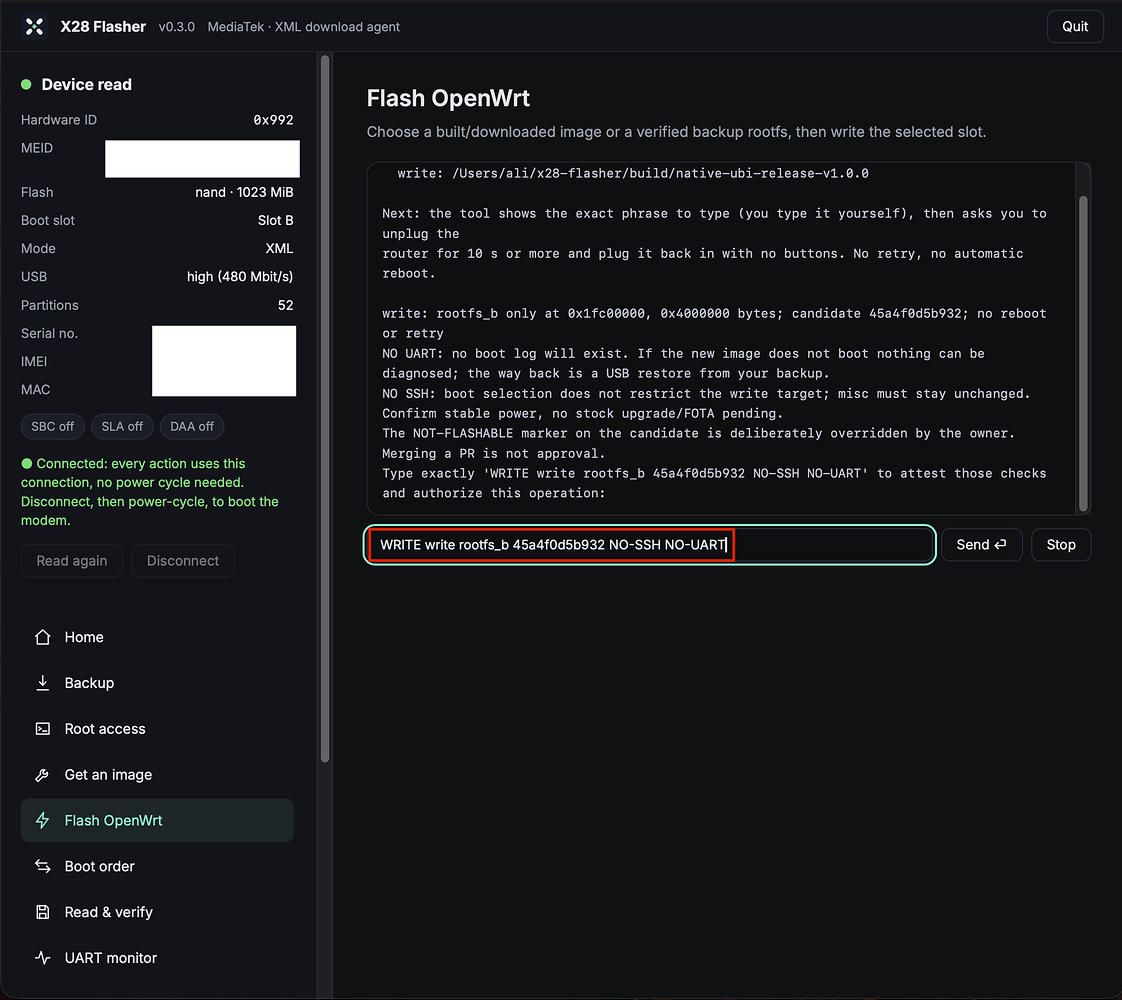
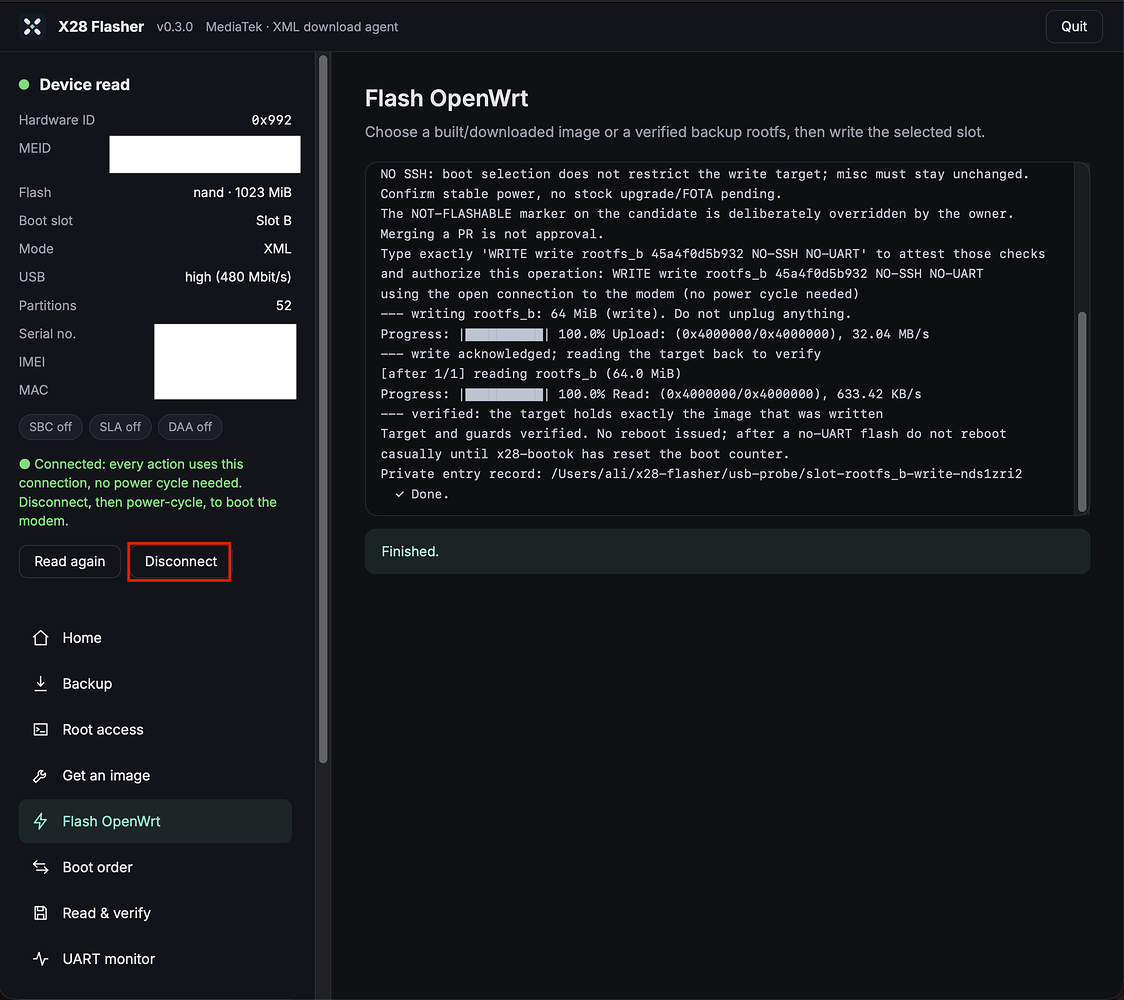
The X28 now boots into OpenWrt. Open https://192.168.70.1/cgi-bin/luci, accept the self-signed certificate and set a root password. SSH is on port 22 from the LAN.
If the router does not boot correctly, you can restore the original firmware from your verified backup.
rootfs_a for slot A, rootfs_b for slot B.This restores the selected rootfs from your backup. Whether the vendor firmware then runs fully depends on the backup and on the state of the other partitions. Developers can still assemble images locally from a vendor backup (needs Docker). Problems? Open an issue with the flasher and firmware versions, your device and the logs.
Straight from GitHub releases. Verify downloads against the release's SHA256SUMS.
Backup, install and recovery.
Image bundle and signed sysupgrade files.
SSH in and use uci, opkg and the project's own tools. Click a command to run it in the simulated console; the output is what the tools print.
| Tool | What it does | Synopsis, from the source |
|---|---|---|
x28-upgradex28-update | Upgrade to the newest signed image. Without -y it only checks; with it, it writes the other slot and keeps your changed settings. | x28-upgrade [--refresh | -y [-b]] |
x28-update-checkx28-update | Read-only check for a newer signed release; prints JSON for LuCI. | x28-update-check [--refresh] |
x28-smsx28-telephony | Text messages, phone book, API keys and the HTTP API. Output is JSON. | x28-sms list | poll | send N TEXT | delete ID… | contacts | contact-set N NAME | contact-del N | keys | key-add LABEL | key-del ID | webhook [URL] |
x28-apnx28-mipc | The APNs of the SIM's operator, from the database the stock firmware ships. | x28-apn [imsi] |
x28-modem-statusx28-mipc | Read-only modem state for LuCI's Carrier tab: operator, registration, serving cell and signal. | x28-modem-status |
x28-plmn-scanx28-mipc | Scan for networks; the modem leaves its network meanwhile. | x28-plmn-scan --start | --state | --last |
x28-nrbandx28-nrband | The 5G band mask and the 5G signal, over the modem's MIPC channel. | x28-nrband get | set W0 W1 W2 | signal |
Full --help output and man pages for every tool are planned: #570.
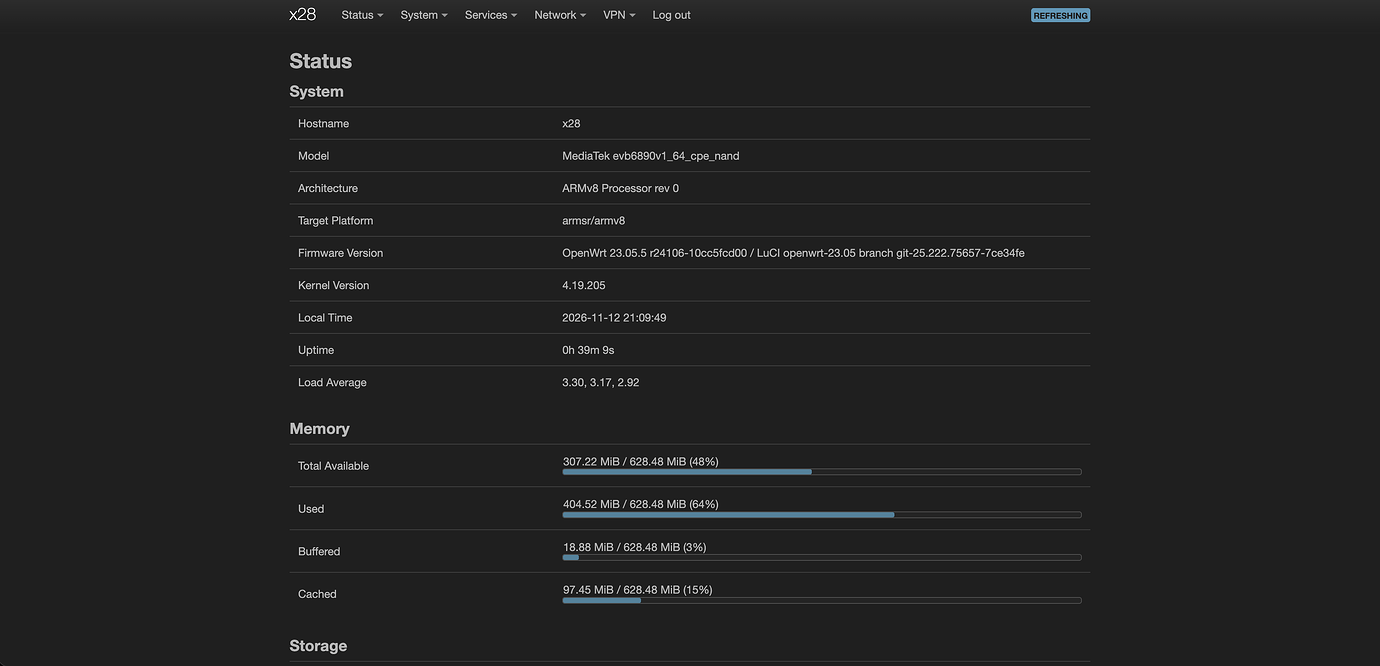
Built around the MediaTek MT6890 platform. Full hardware notes
| Processor | MediaTek MT6890 (T750), 4x Cortex-A55, 0.5 to 2.0 GHz |
| Architecture | aarch64 (64-bit ARM, musl libc) |
| Kernel | 4.19.205 vendor kernel with OpenWrt 23.05.5 userspace |
| Cellular Modem | Quectel RG500L-EU, 5G NR + LTE, on the SoC's modem processor; 4 antennas, one nano-SIM |
| SMS & Telephony | x28-telephony: text messages in LuCI + local HTTP API |
| Voice / VoIP | In development |
| Wi-Fi Subsystem | MediaTek MT7915, dual band (X28: one MT7915D chip; X28 PRO: two MT7915 chips) |
| Ethernet | 4 LAN sockets: one 2.5 G, three 1 G |
| Memory | 1 GiB RAM; Linux gets about 628 MiB, the rest is the modem's |
| Flash | 1 GiB NAND, 51 partitions, A/B slots; about 288 MiB for installs and settings |
| Reset Button | Hold for 10 s to reset to defaults |
| Recovery Port | USB-C, MediaTek preloader; USB-A to USB-C cable only |
| Serial Console | UART, 921600 8N1, 1.8 V logic, unpopulated 3-hole footprint |
What changes when you move from the stock firmware to this image.
| Feature Category | Stock Vendor Firmware | X28 OpenWrt v1.1.1 |
|---|---|---|
| Operating System | Vendor firmware and web UI | OpenWrt 23.05.5 userspace on the vendor 4.19 kernel |
| SMS & Telephony | Vendor web page; messages stay on the SIM (50 slots) | Conversations in LuCI + local HTTP API; messages kept on the router |
| VoIP & Voice Calls | Voice calls through the vendor firmware | In development VoIP with a VoIP server on the router; not ready yet |
| 5G Band & Cell Locking | Vendor UI | Band & cell locking in LuCI |
| Web Management Interface | Vendor web UI | Standard LuCI over HTTPS + UCI |
| VPN & Proxy | Not part of the vendor UI | Passwall2, WireGuard, OpenVPN, L2TP, PPTP, SSH tunnels |
| Package Management | No package manager | Signed kernel-compatible opkg feed |
| Firmware Upgrade Safety | Vendor updates | Signed A/B sysupgrade to the inactive slot |
| Update Controls | Vendor UI | x28-upgrade command & LuCI update notice; nothing installs by itself |
| SSH & Root Access | Not offered | SSH on port 22 from the LAN |


An article series by Ali Naderi Parizi, in Persian, follows this project from the first look at the hardware to signed A/B upgrades. Part 1 is online: the hardware, the UART console and access to the 5G modem.
Read part 1 on Sisoog